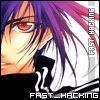
I think I need to make a good use of my blog for my visitors. Here's something to make y'all get busy with me here. I present t, my first
ImageReady Basic Tutorial that I submitted to the famous forum,
OMAN3D. I will be going easy on you and I hope you will fully understand each step.
Here's something expected from you to outcome from this tutorial.
First make your pizza next to you and get started by then,
1- When you have your desired design done one Photoshop, go to the Tools bar and click on Edit in ImageReady (or click Shift+Ctrl+M)

2-Now you have a similar interface as the one for Photoshop. The Animation bar should appear by default, if not press F11 or simply go to Windows and tick on Animation.
3- Select your desired layer(s). For the sake of this tutorial, I chose the Text layer.

4-Go to the animation bar and duplicate the current frame. Then, go to the Text layer and change the Opacity to 80%.

5-Keep repeating step 4 but with different descending numbers (by 20% in each layer in this tutorial). Once you reach 20% Opacity, make the next frame's Text layer to be 10% instead of 0%. After that, use ascending numbers and stop at 80%. ( because the Text layer in frame 1 is 100%)
6-Now you're almost done and you can play your Animation.
7-If you're not happy with the animation frame time you can always change each frame's timing by clicking under the frame display layer. In my final image, I made the delay on each frame to 0.1 second.

8-Save your animation by going to File, Save Optimized As ( Shift+Ctrl+Alt+S) and choose your destination to save. Make sure that the format is of type GIF.
End of the Tutorial.
-------------------------------------------
Please if there is anything that is not clear, then point it out. P.S: show me your work please :D
Enjoy ^_^